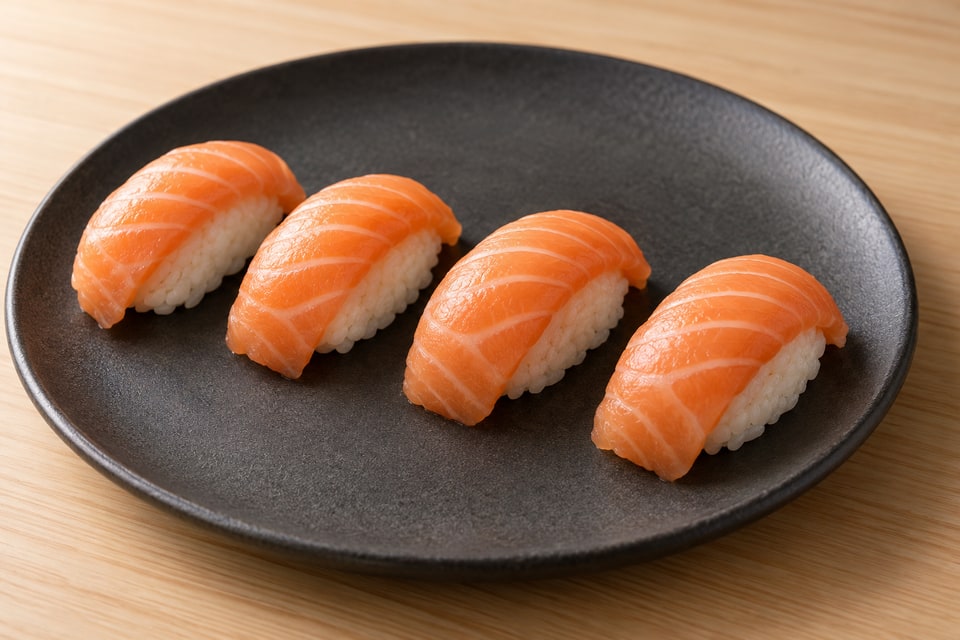
Understanding Nigiri: The Art of Simplicity
Nigiri is sushi in its most elegant and demanding form: a small oval of rice topped with a slice of fish or other topping. The word "nigiri" comes from "nigiru," meaning to hold or grip, referring to the hand-formed shape. Nigiri is deceptively simple—two components, no rolling, no wrapping. This simplicity makes nigiri profoundly difficult: every element is visible, and poor execution cannot be hidden. A beautiful nigiri requires perfect rice, perfect fish placement, perfect proportions, and perfect intuition about temperature and timing. Nigiri is what separates sushi home cooks from sushi makers. A perfect nigiri tastes of rice, fish, and subtle wasabi—nothing more, nothing less.
The Three-Squeeze Rice Forming Technique
Begin with cooled sushi rice at body temperature. Wet your right hand (or non-dominant hand) thoroughly; water prevents sticking. Grab approximately one tablespoon of rice (this will form the base of your nigiri). Using your right hand, gently compress the rice into a small oval shape using three deliberate squeezes. This is not a grip; it's three gentle compressions that shape the rice without crushing it. The resulting oval should be approximately 2 inches long by 1 inch wide by 3/4 inch tall. The rice should be compact enough to hold together but not so dense that it feels hard or tastes heavy. Each squeeze should come from your palm and fingers working together to shape, not from clenching. This three-squeeze technique produces consistent, properly-textured nigiri. More squeezes compress the rice too much; fewer squeezes leave it too loose. Practice this hand motion repeatedly until you develop the muscle memory for the exact pressure and timing.
Slicing Fish for Nigiri and the Kakushi-Bocho Technique
Your fish slice should be approximately 2 by 1.5 by 1/8 inch—slightly larger than your rice base so it can drape slightly over the edges. Using your angle cut technique with a very sharp, wet knife, slice your fish carefully and deliberately. Each slice should come cleanly without tearing. You should produce slices that are remarkably consistent in size and thickness. Once sliced, you can apply a subtle technique called kakushi-bocho ("hidden knife"—shallow score cuts) if desired: using the edge of your knife, make one or two very shallow score cuts across the fish slice. These cuts don't go through the flesh; they sever tough sinew, help the fish drape naturally over the rice, and improve adhesion. This technique is optional and requires experience to do well; it's worth understanding but not essential for beginner nigiri. For raw fish, ask the supplier to document suitability for raw consumption and the applicable parasite controls. Keep it refrigerated until preparation. A label or visual inspection alone is not sufficient; see the Sourcing Fish Safely lesson and the linked FDA references.
Wasabi Application and Fish Placement
Place your formed rice oval on a cutting board with the seam side down. Apply a tiny amount of wasabi—a dab about the size of a grain of rice to a small pea (1/16 teaspoon or less)—along the center of the rice oval using a small brush, chopstick, or your pinky finger. Less is more; too much wasabi overwhelms the delicate fish. Some chefs place wasabi directly on the fish instead of the rice; both approaches work. The wasabi should be a thin, barely-visible line. Now, with your left hand, pick up your fish slice. Position it over the rice so that it aligns with the rice's long axis and drapes slightly over both ends. Using your fingers and gentle pressure, press the fish down onto the rice and wasabi. The fish should adhere without sliding. Some chefs use the warmer knife to gently warm and soften the fish slightly to help adhesion; this is an advanced technique that improves consistency but isn't necessary for beginners.
The Temperature Contrast Principle
The saved Salmon Nigiri recipe calls for gently warm rice, around 30–36 °C (86–97 °F), and seafood kept at 4 °C (40 °F) or colder until preparation. This is a brief assembly and immediate-service contrast, not a reason to leave fish warming on the counter. Prepare the plates first, take out only what you are ready to cut and shape, and return unused fish to refrigeration between batches.
Nigiri Assembly Timing and Service
Nigiri should be served immediately after assembly. They don't hold well for more than a few minutes; rice dries slightly and becomes gluey if allowed to cool too much. This timing constraint means you should assemble nigiri close to service time, not hours in advance. In a professional sushi bar, the chef forms nigiri only as they're ordered or only moments before service. At home, if you're making nigiri for yourself or a small gathering, assemble them in batches of three to four so that by the time you finish plating a batch, they're ready to eat. Some chefs keep rice warm in a covered bowl between batches. Others keep fish cold until the moment of use. The goal is consistent temperature throughout the entire process from rice formation through service.
Practice Progression and Developing Intuition
Your first nigiri will likely feel awkward and may not hold together well. This is completely normal. By your fifth nigiri, you'll develop a feel for the rice compression. By your fifteenth, you'll form rice without thinking about pressure or squeezes. By your fiftieth, you'll start to see subtle variations in rice and respond intuitively. The mark of a skilled nigiri maker is invisible: you don't notice technique because it's so smooth and confident. The rice is perfectly shaped, the fish is flawlessly placed, the proportions are ideal, and the whole thing tastes of just rice, fish, and wasabi. This intuition and consistency develop only with repeated practice. A sushi chef typically trains for two to three years before being trusted to make nigiri for customers. You don't need this level of training for home use, but the path to great nigiri is the same: repeated, attentive practice.
Keep these details in mind.
- Use the three-squeeze technique to form rice ovals approximately 2 by 1 by 0.75 inches, neither crushing nor underpacking
- Slice fish with a sharp, wet knife at a slight angle; each slice should be thin, consistent, and slightly larger than the rice base
- Apply a tiny amount of wasabi to the rice, then gently press the fish slice onto the rice and wasabi to adhere
- Maintain temperature contrast: warm rice (body temperature) with cold fish creates the ideal eating experience
- Assemble nigiri close to service time; they deteriorate if held for more than a few minutes
From reading to cooking.
Salmon Nigiri · Perfect Sushi Rice
Return to the journal ↗