A note on rice safety
The original texture guidance below remains intact. Cooked rice is perishable: serve promptly and follow the recipe’s storage guidance. A preference for warm rice is not permission for prolonged room-temperature storage.
Read the rice handling guide →The dish
At a glance
| Active time | About 20 minutes |
|---|---|
| Waiting | Washing rest 30 min; cooking 22 min; folding 4 min |
| Difficulty | Easy — the work is in the sequence |
| Key techniques | Washing to clear water; cutting-fold seasoning; fanning to body temp |
| Make-ahead | None by design — sushi rice is used within 2 hours of seasoning |
| Anchors | Every nigiri, maki, chirashi, and temaki on this site |
A closer look at the ingredients
Quantities live in the recipe card.
The rice
short grain only. Koshihikari is the standard; Calrose is a
The cooking
the ratio is measured by weight, not by knuckle.
- it lends glutamate depth; wipe, don't rinse
The seasoning (sushizu)
warmed only to dissolve.
Before you begin
- Equipment: a heavy pot with a tight lid; a hangiri (cedar tub) or the widest, shallowest non-reactive bowl you own; a rice paddle; a fan — a piece of stiff card is traditional and completely adequate; a clean damp cloth. - Wet the paddle before every contact with rice. Wet rice does not stick to wet wood. - The bowl matters more than it looks: wide and shallow cools the rice fast and evenly, which is exactly what the seasoning step needs.
The craft, step by step
The complete method.
Read through once before you begin. The working recipe follows below.
Doneness & Quality Checkpoints
- Washing water runs nearly clear; grains intact, not broken.
- Cooked grain: no hard center when pressed; holds a clean edge.
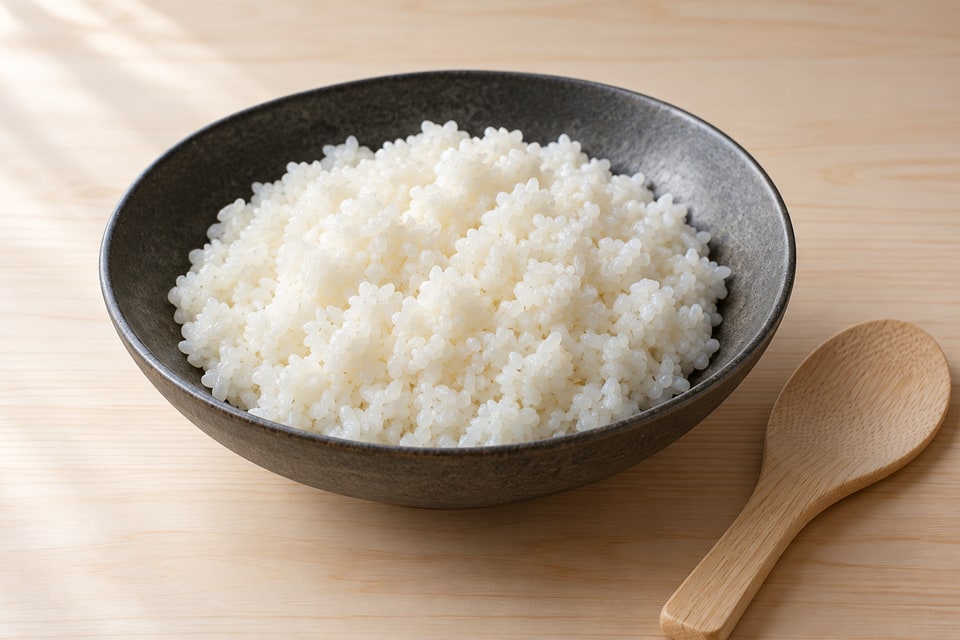
- After seasoning: grains distinct and glossy; no liquid in the bowl.
- Temperature at use: body temperature (36 °C / 97 °F) — warm, not hot,
- Taste: a quiet balance — sweet first, tart behind it, salt barely there.
Finish & Plate
Seasoned rice waits under its damp cloth, never in the refrigerator, and goes onto fish or nori within two hours. Before touching it, wet your hands with tezu — 250 ml (1 cup) water mixed with 1 tbsp rice vinegar. That film of acidulated water keeps the grains from sticking to you instead of each other. For nigiri, portion 18–20 g per piece and shape with three light finger-presses, turning once; the finished ball should hold together yet loosen again at the bite. For maki, spread the rice in a thin, even veil across the nori — you should see the nori through it in places. The rice is the plate; everything else is garnish.
Chef's Note — keep the tezu bowl beside the board and re-wet between every piece. Dry hands are the most common cause of crushed, compacted rice at home — work calmly, and the rice will never know you're hurrying.
The working recipe
Perfect Sushi Rice
Prep: 45 minutes (mostly waiting) · Cook: 22 minutes · Total: About 1 hour 15 minutes · Makes about 1.1 kg — 8 maki rolls or roughly 40 nigiri
Ingredients
The rice
The cooking
The seasoning (sushizu)
Instructions
- Wash the rice. Put the rice in a bowl, cover with cold water, swirl with your hand for ten seconds, and pour off the cloudy water. Repeat four to five times. and intact — not shattered. The wash removes loose surface starch, which is the difference between grains and gum. Checkpoint — the water runs nearly clear, and the grains look milky
- Rest the drained rice 30 minutes. Surface-dry rice cooked immediately hydrates unevenly — hard centers, blown edges. The rest equalizes moisture through every grain.
- Cook, covered and untouched. Rice, measured water, and kombu into the pot. (If using kombu, let it soak 10 minutes first.) Lid on, high heat to a boil, then the lowest flame for 12 minutes. Off the heat, rest 10 more minutes, lid sealed. No peeking — every lifted lid vents the steam the rice is still finishing with. fingers shows no opaque, hard center. Checkpoint — the lid sits quietly, and a grain pressed between two
- Dissolve the seasoning. Warm the vinegar, sugar, and salt in a small pan, stirring until dissolved — 1–2 minutes. Do not let it boil; boiling drives off the vinegar's aroma. Checkpoint — the liquid is clear, with no sugar grit at the bottom.
- Season and cut. Turn the hot rice out into the wide bowl (kombu removed). Drizzle the sushizu over the paddle and onto the rice. Now the defining motion: slice the paddle vertically through the rice, turn the bowl a quarter turn, slice again — a cutting fold, never a stir. Stirring crushes grains and turns sheen to glue. vinegar pooling at the bottom of the bowl. Checkpoint — every grain distinct, the whole mass glossy, no
- Fan while folding. Continue the cutting fold while fanning for 3–4 minutes. Fanning cools the rice and sets the vinegar glaze — the gloss you see at good counters is the seasoning setting, not oil. warm to a fingertip, never hot. Checkpoint — the rice is at body temperature, about 36 °C (97 °F):
- Hold it right. Cover with a damp cloth until use. Seasoned rice is at its best for 2 hours at room temperature. stiff, it is finished as sushi rice. Checkpoint — still warm and supple at assembly; if it has gone
Troubleshooting
| Symptom | Cause | Fix |
|---|---|---|
| Mushy, gummy rice | Under-washed, over-watered, or stirred instead of cut | Measure water by weight next time; wash to nearly clear; use the cutting fold |
| Hard, chalky centers | Skipped the drain rest, or a very old bag of rice | Rest 30 minutes; if the rice is old, add 15 ml (1 tbsp) water per 500 g |
| Too sour | Over-seasoned, or seasoning applied to hot rice that drank it unevenly | Follow the gram measures; always season at the folding stage, never on the stove |
| No gloss | Fanned too little, or the sushizu boiled | Fan while folding until the sheen sets; dissolve the seasoning gently |
| Rice went hard in the fridge | Starch retrogradation — irreversible | Use it in onigiri or fried rice; cook fresh for sushi |
Storage, Make-Ahead & Variations
- This recipe does not store: season what you will serve within 2 hours. - Unseasoned plain rice keeps fine refrigerated; revive it in onigiri or fried rice. - Instant pot: 500 g rice to 550 ml water, kombu in, manual high pressure 4 minutes, natural release 10 minutes — then season and cut exactly as written. - Brown sushi rice: increase water to 650 ml (2¾ cups) and cook 35 minutes; expect a heartier, nuttier shari that still takes the seasoning beautifully.